
Here is a step by step guide to set up an EC2 instance, installing the required software and deploying a WAR file.
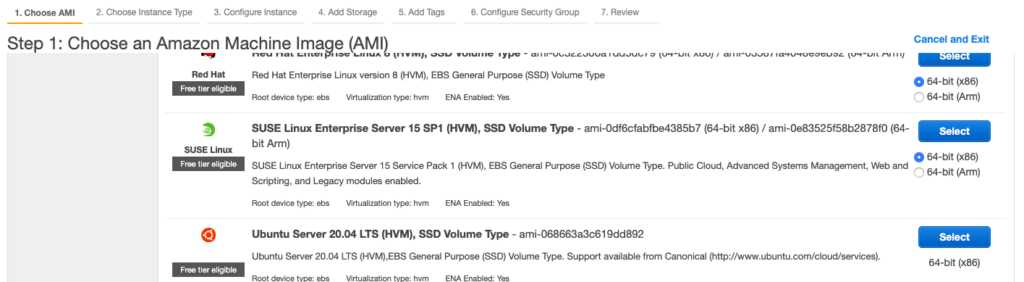
1. The first step, of course, is to get a new EC2 instance. I am launching a new Ubuntu machine to start with, using a free tier configuration for this demo, with all default values. Make sure you have access to key-pair you are using as you will need to access the machine to install software or create a new key pair.
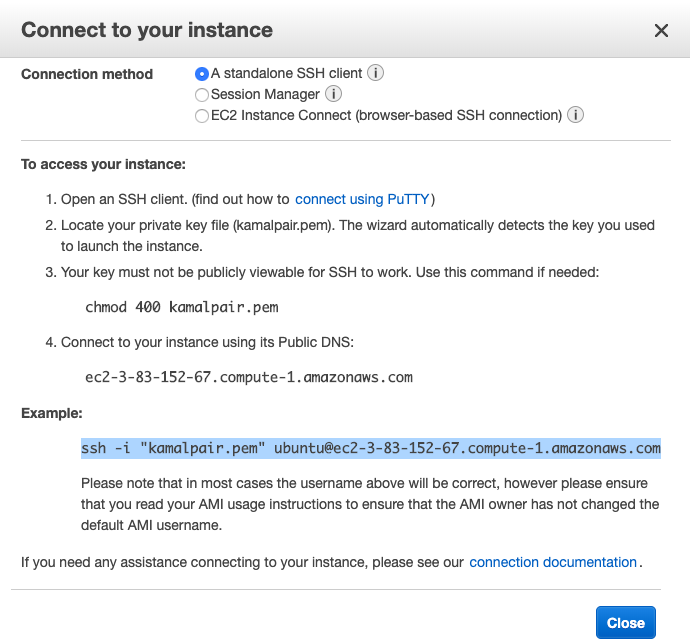
2. Right-click on the instance just booted, click connect. It will give you details on how to connect to the machine. Follow the instructions and you will be in the machine.
3. Set of commands to get wildfly server up and running on the EC2 machine
sudo apt update
sudo apt install default-jdk
sudo groupadd -r wildfly
sudo useradd -r -g wildfly -d /opt/wildfly -s /sbin/nologin wildfly
Version_Number=16.0.0.Final
wget https://download.jboss.org/wildfly/$Version_Number/wildfly-$Version_Number.tar.gz -P /tmp
sudo tar xf /tmp/wildfly-$Version_Number.tar.gz -C /opt/
sudo ln -s /opt/wildfly-$Version_Number /opt/wildfly
sudo chown -RH wildfly: /opt/wildfly
sudo mkdir -p /etc/wildfly
sudo cp /opt/wildfly/docs/contrib/scripts/systemd/wildfly.conf /etc/wildfly/
sudo nano /etc/wildfly/wildfly.conf
sudo cp /opt/wildfly/docs/contrib/scripts/systemd/launch.sh /opt/wildfly/bin/
sudo sh -c ‘chmod +x /opt/wildfly/bin/*.sh’
sudo cp /opt/wildfly/docs/contrib/scripts/systemd/wildfly.service /etc/systemd/system/
sudo systemctl daemon-reload
sudo systemctl start wildfly
sudo systemctl enable wildfly
sudo ufw allow 8080/tcp
If you try to hit port 8080 of the machine, you will see a default Wilfly page
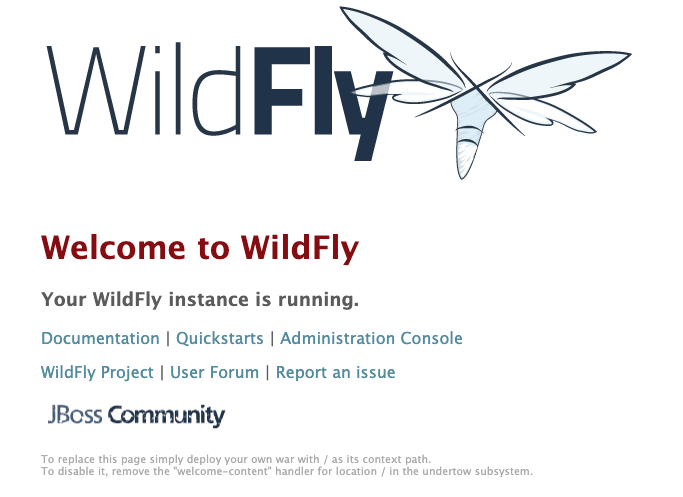
If you are seeing this page, you know that wildfly is installed properly.
4. Next step is to finally add our war file, for this example, I will just copy the war file to the deployment folder
sudo wget https://war.file.path/HelloWorld.war /opt/wildfly/standalone/deployments/5. Lastly, we will check our URL and validate
http://ec2.path.url:8080/HelloWorld/rest/hello