Tag Archives: Monitoring

Tools for Monitoring Applications Logs

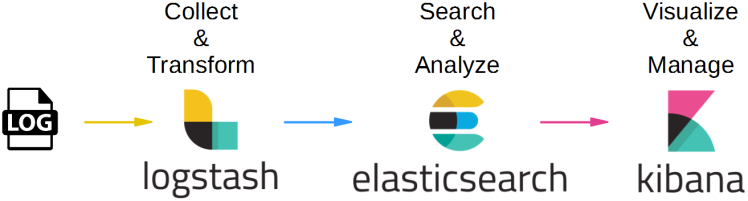
Monitoring logs for an application is an important part of any deployment and support cycle. You want to keep a check on logs to understand what is happening with your application. But these logs are mostly GBs of raw data, that making sense out of this is not very easy. Thankfully there are many off the shelf tools available to help us out in this tedious task. I have already talked about ELK which is a popular tool for log analytics. In this post, we will talk about some of the other popular tools and get an idea of how these can help us.

Splunk is a tool to collect and analyze logs. Splunk basically has three core components, a forwarder which will forward data to Splunk server, An indexer which takes the data and indexes it for better search and finally Search head component which actually looks into the data and searches relevant information. An important aspect of Splunk is that it can easily scale horizontally with Splunk cluster, so you can manage GBs of data coming in the form of logs.

Graylog is another option for log monitoring. You can stream your logs to Greylog, which uses MongoDB and ElasticSearch behind the scenes to make sure you get fast and useful analysis.

Then there are specialized tools like SumoLogic for log analysis, which works on your log data and can provide additional analytics based on your logs. It can help you make sense of your logs as well as provide suggestions.

The list of tools providing log management, monitoring, and analysis tools is increasing by the day as people are recognizing the need and importance of mog monitoring. Here are some additional resources for interested readers.
https://www.dnsstuff.com/free-log-management-tools
https://dzone.com/articles/top-10-log-management-tools-1
https://www.comparitech.com/net-admin/log-management-tools/

Prometheus for monitoring and alerting

I have talked about how to use tools provided by Azure and AWS for monitoring the health of your applications and servers. But there will be times when you need something opensource to keep you independent of the underlying cloud service provider. Prometheus is one such tool that will help in these cases.

Prometheus is an open-source monitoring and alerting tool. It helps gather metrics in time series data format from various sources and monitor that. Written in Go language, the tool can be combined with Grafana or other consumers to capture and visualize data.

Prometheus architecture
image source https://prometheus.io/docs/introduction/overview/

Image above shows the architecture for Prometheus. Following are the core components

Prometheus Server: The server collects metrics from applications and stores them locally. Data is collected at regular intervals and stored for processing.

PushGateway: There are cases when an endpoint cannot be exposed by the application due to the nature of its work, such as static jobs. The Push gateway captures the data, transforms that data into the Prometheus data format, and then pushes that data onto the Prometheus server.

Alert Manager: Based on collected data, rules can be configured to send alerts in the form of SMS, Email, etc.

Client Libraries: A set of client libraries is provided which can be added to application code for enabling monitoring endpoints.

References: https://prometheus.io/docs/introduction/overview/
https://www.amazon.com/gp/product/B0761Z1W9S

ELK stack- Getting started

In the last three posts, I had talked about three popular off the shelf monitoring tools by cloud service providers, i.e. AWS CloudWatch, Azure Application Insights, and Azure Monitor. A discussion about monitoring cloud-native applications and microservices is incomplete without discussing ELK stack. ELK stack provides end to end functionality from capturing logs, indexing them in a useful manner, and finally visualizing them in a form that makes sense. Three core components that make the ELK stack are Elastic Search, Logstash, and Kibana.

Image source – https://medium.com/devxchange/streaming-spring-boot-application-logs-to-elk-stack-part-1-a68bd7cccaeb

As the image above shows, three tools forming ELK stack work together, where Logstash is responsible for the collection and transformation of logs, ElasticSearch indexes and makes logs searchable, and finally Kiabana helps them visualize in forms of reports which are easy o make sense of.

Let’s take a look at these three components.

ElasticSearch: is a popular search engine implementer. It indexes data and helps in implementing quick searches. It is based on Apache Lucene and provides REST APIs for accessing data. It is highly scalable and reliable, implemented on the No-SQL database.

Logstash: provides connectors for various input sources and platforms, helping in the collection of logs data from different sources. It can collect, parse, and manage a variety of structured and unstructured data.

Kibana: is basically a visualization tool, provides various user-friendly visual options for reporting like graphs, bars, tables, etc. One can create and share dashboards for an easy understanding of data in form of visual reports.

Additional resources:
https://www.youtube.com/watch?v=MRMgd6E9AXE
https://medium.com/devxchange/streaming-spring-boot-application-logs-to-elk-stack-part-1-a68bd7cccaeb
https://www.guru99.com/elk-stack-tutorial.html

Azure Monitor

Azure Monitor is a tool, which acts as an umbrella for services that help us gather telemetry data and analyze it. Azure Monitor Captures data in form of Logs and Metrics. Logs contain time-stamped information about changes made to resources. Logs data is mostly in text form. Whereas Metrics are numerical values that describe some aspect of a system at a point in time. 

image source https://docs.microsoft.com/en-us/azure/azure-monitor/overview

The image above shows how Azure monitor gathers data in form of Logs and Metrics from Applications and other Azure resources. Once data is gathered, Monitor can be used to view and analyze data in the form of tables and graphs. In addition, one can set up an automated response in the form of Alerts or passing the information to Logic Apps or Custom APIs.

You can capture the following data for Azure monitor

Application data: Data that relates to your custom application code.
Operating system data: Data from the Windows or Linux virtual machines that host your application.
Azure resource data: Data that relates to the operations of an Azure resource, such as a web app or a load balancer.
Azure subscription data: Data that relates to your subscription. It includes data about Azure health and availability.
Azure tenant data: Data about your Azure organization-level services, such as Azure Active Directory.

source: https://docs.microsoft.com/en-us/azure/azure-monitor/overview

Here is an example explanation of Azure monitor usage

Azure Application Insights

Once your application is deployed in a production environment, you want to make sure everything is working fine with it. You would like to analyze how many exceptions and errors are being thrown, how many requests are being handled, how many requests are being made, what is memory and CPU usage, and so on. In Azure, you can do all this by using the Application Insights tool.

Application Insights instrumentation in your app sends telemetry to your Application Insights resource.
image source – https://docs.microsoft.com/en-us/azure/azure-monitor/app/app-insights-overview

You can see in the above image that your application components will publish the data to Application Insights service, from where you can create alerts, reports, or trigger other actions based on your need.

Setting up Application Insights need some instrumentation on your application side. Mostly it is as simple as importing the SDK and adding a config file. Here is a detailed explanation of how to implement it for a Java Project https://docs.microsoft.com/en-us/azure/azure-monitor/app/java-get-started?tabs=maven.

You can gather following information from Applications Insights.

  • Request rates, response times, and failure rates
  • Dependency rates, response times, and failure rates 
  • Exceptions
  • Pageviews and load performance
  • AJAX calls
  • User and session counts
  • Performance counters 
  • Host diagnostics
  • Diagnostic trace logs
  • Custom events and metrics

For more information on Application Insights and usage with different languages – https://docs.microsoft.com/en-us/azure/azure-monitor/app/app-insights-overview

Amazon CloudWatch

Once your application is deployed to production, monitoring is the only friend that can help you avoid embarrassing situations like a service not responding or an application is running very slow. You would like to make sure that monitoring and alerting systems are in place so that before you start hearing complaints from your end users, you can know about the problem and fix it. You would also like to make sure automated systems are in place to handle such issues.

Amazon CloudWatch is a service provided by AWS which can help us add monitoring for AWS resources.

image source https://docs.aws.amazon.com/AmazonCloudWatch/latest/monitoring/cloudwatch_architecture.html

Let’s try to understand the above design. AWS services publish data to cloud watch in the form of metrics. Metrics here contain time-ordered data for various aspects, like CPU usage. Cloud watch processes the data and is capable of showing that in the form of graphs and bars. One can also set alarms on certain events like CPU usage goes beyond 75%. Based on alarm action can be taken like sending an email notification to admins or autoscale the application by adding an additional server to reduce CPU usage. One can also publish additional application data to CloudWatch for monitoring.

Let’s take a look at how we can create metrics and alerts for EC2 instance. Basic CloudWatch is by default enabled for EC2. You can enable detailed monitoring which will register events every minute, but it is a paid option.

For this example, I will move ahead with basic default monitoring. As I mentioned that default monitoring is enabled by default, so once you go to CloudWatch, select EC2 resources and you will see some default metrics already in place.

As a next step, we will add Alarms for the instances. You can set up alarms at an individual level, scale group level for autoscale, type of instance, and so on. For the sake of this example, I am choosing a metric of average CPU utilization for all my EC2 instances.

So the alert I am setting says that whenever average CPU utilization for all my instance goes beyond 50% an alarm should be raised. As a result of alarm, I can make the CloudWatch send a message to SNS or Simple Notification Service Queue, from which I can read in some application or serverless function and configure to send email or SMS notifications. One can also set auto-scale options like adding or removing servers or simply restarting an EC2 instance based on the alarm.