
With the popularity of microservices-based design, we are ending up with tens and hundreds of APIs being created for our applications. Apigee is a platform for developing and managing APIs. It provides a proxy layer for our backend APIs. We can rely on this proxy layer to provide us with a lot of features like security, rate limiting, quotas implementation, analytics, monitoring, and so on.
The core features provided by Apigee are
Design: One can create APIs, and configure or code policies as steps in API flows. Policies can help implement features like rate limiting, quota implementation, payload transformation, and so on.
Security: One can enforce security best practices and governance policies. Implement features like authentication, encryption, SSL offloading, etc at the proxy layer.
Publish: We can provide reference documentation and manage the audience for the API from the portal.
Analyze: Drill down usage data, investigate the spikes and trace calls in real time.
Monitor: Ensure API availability and provide a seamless experience to the APIs.
Hands on example
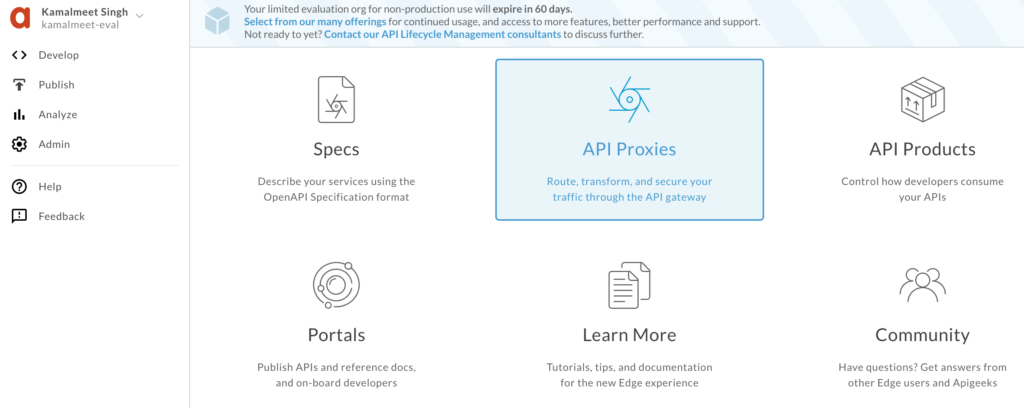
Getting started with Apigee is easy, go to https://apigee.com and create a free 60-day evaluation account for testing. Once logged in, choose the API proxies option to get selected.
Create a new proxy, and we will select reverse proxy to start with.
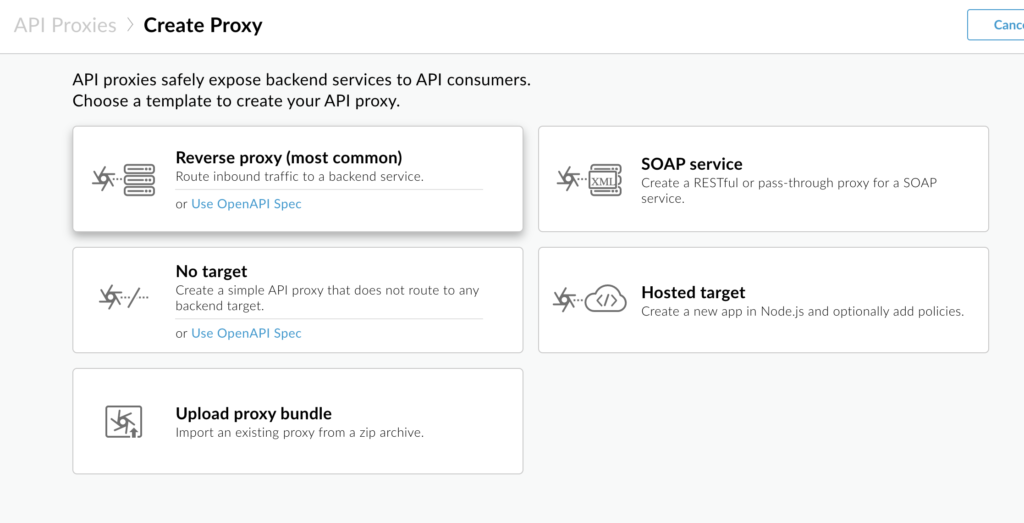
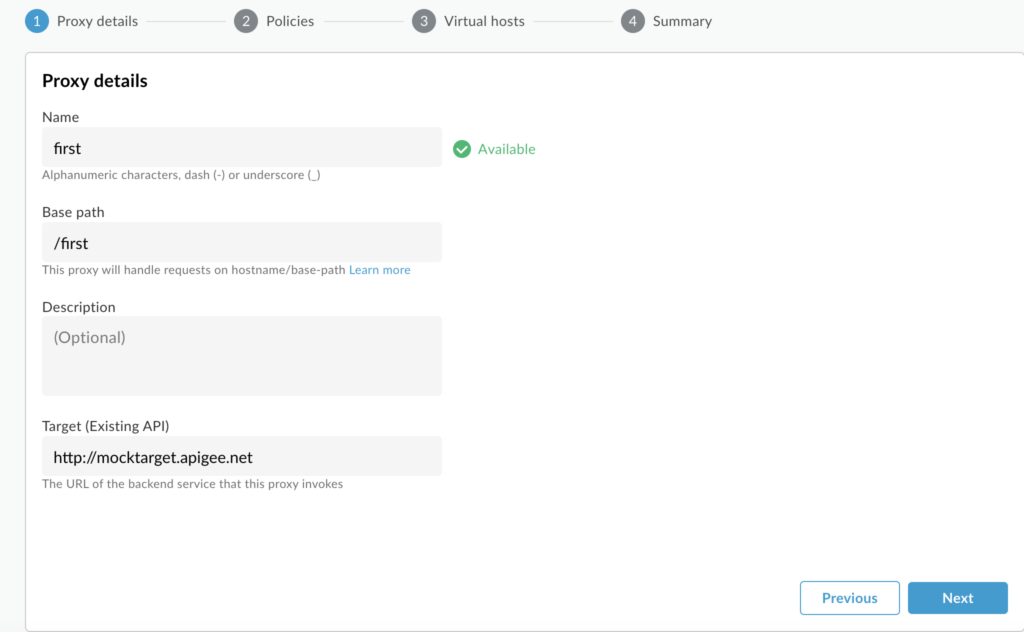
To start with, we will use the sample API provided by apigee- http://mocktarget.apigee.net (just prints string “Hello Guest”), and provide name, base path, and some description. You can see we have several other options like SOAP service, which is very useful if you have an existing SOAP service and want to expose it as REST services. Also, there is a No Target option which is helpful when we are creating Mock APIs to test our client applications. But as mentioned, for now, we are creating a reverse proxy for this example.
For the first iteration, we will not add any policy and leave all other options as default (no policy selected).
Once created, we will deploy the API to the test environment. For a free evaluation version, we are provided two environments only, test and prod.
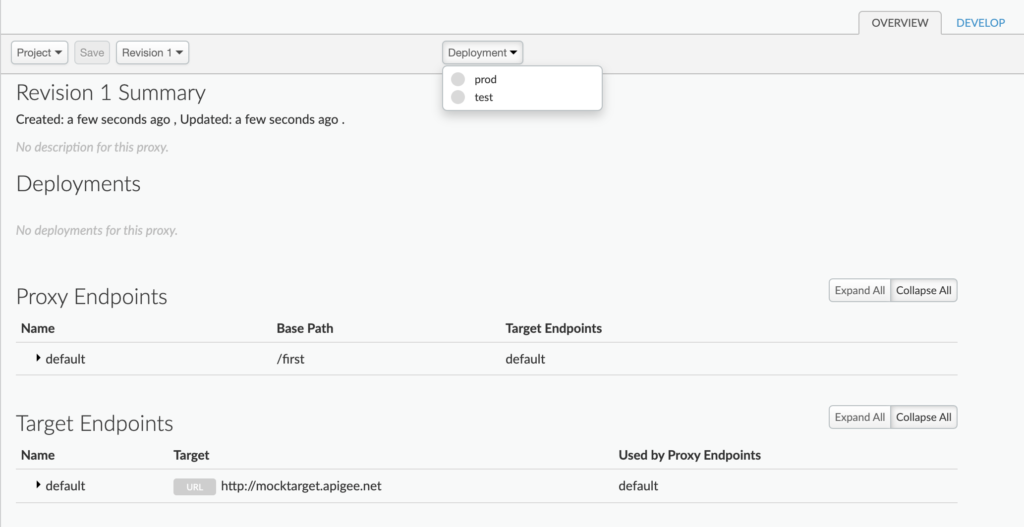
After successful deployment, a proxy URL will be provided by apigee, something like https://kamalmeet-eval-test.apigee.net/first, which we can hit and get the output (Hello Guest). We can see that we are hitting proxy URL which in turn hits the actual URL, in this case, http://mocktarget.apigee.net/.
Go get an understanding of what is happening behind the scenes, we will look into the “Develop” tab.
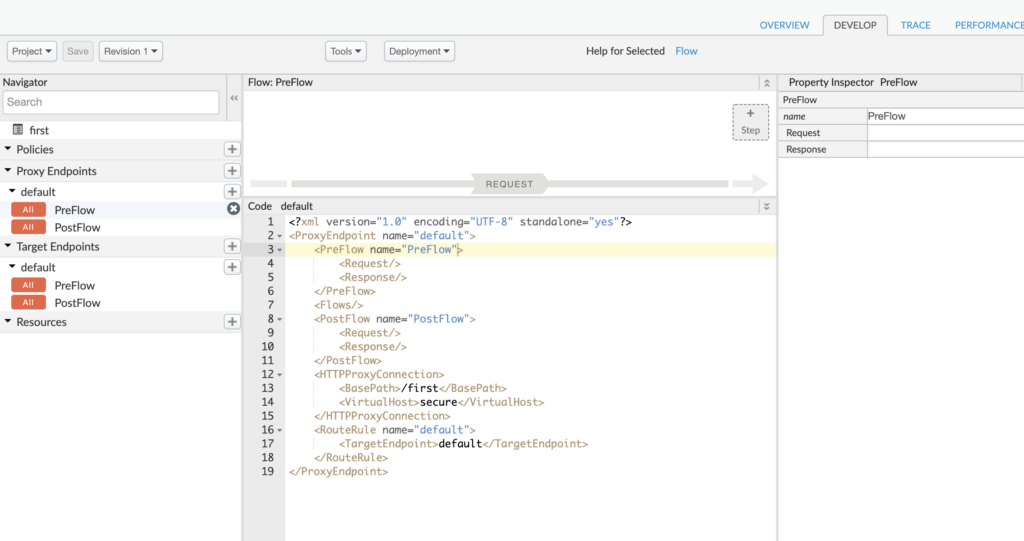
We can see two sets of endpoint settings, a proxy endpoint, and a target endpoint. The proxy endpoint is the one exposed to the calling service. The target endpoint is the one that is communicating with the provider service.
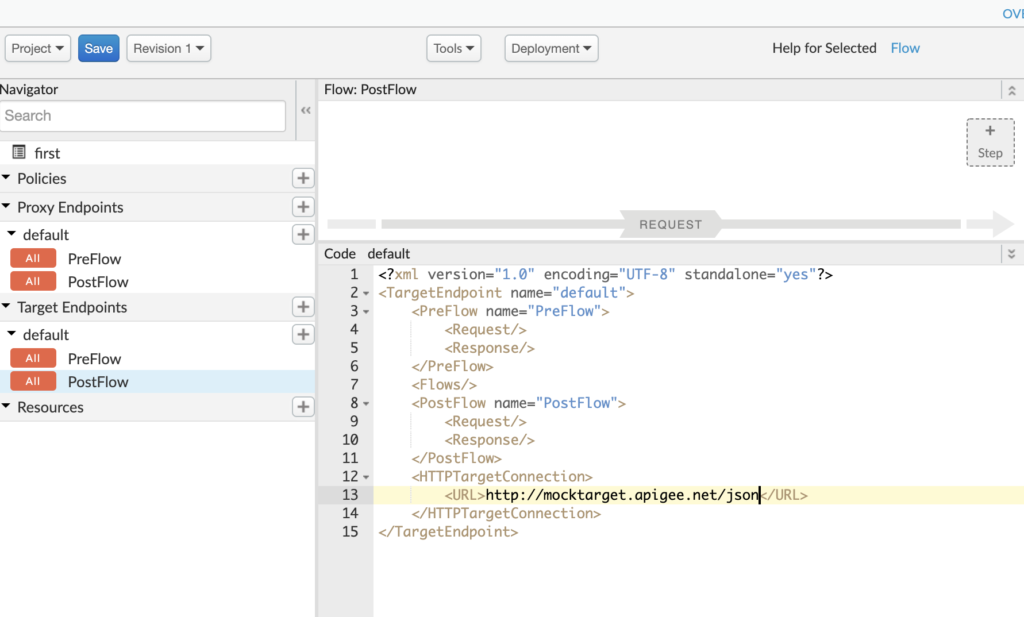
Currently, we have not done much with the endpoints so we see very basic XML settings. On the proxy side, all we see is connection /first and the fact that we are exposing a secured URL. Similarly, on the target side, all we have is the target URL.
To make the API more meaningful, let’s modify the target endpoint to https://mocktarget.apigee.net/json, which returns a sample JSON like
{
"firstName":"John",
"lastName":"Doe",
"city":"San Jose",
"state":"CA"
}
We can update the same Proxy that we created earlier or create a new one. To update the existing one, just go to the develop tab and update the target endpoint URL.
When you click on save, it will deploy automatically (else you can undeploy and deploy). Once done, you will see the existing proxy URL that we created now returns the JSON response https://kamalmeet-eval-test.apigee.net/first. So far we have not added any policy to our APIs. Well, that is easy, in the same develop tab, just above the XML definitions we see a flow diagram.
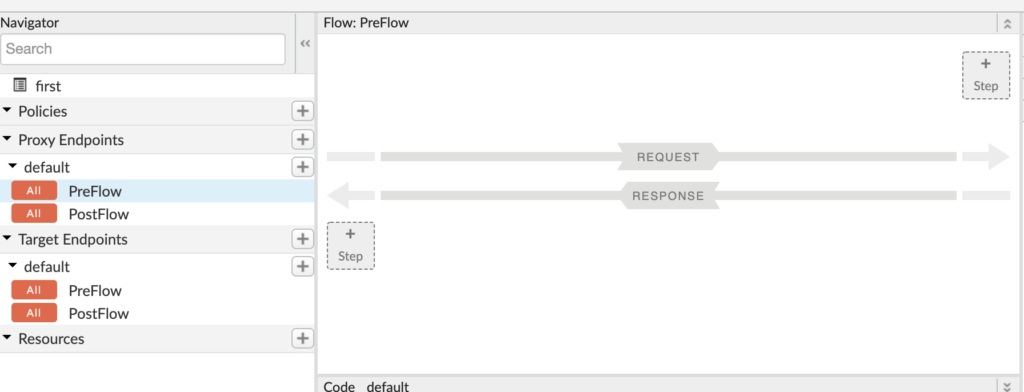
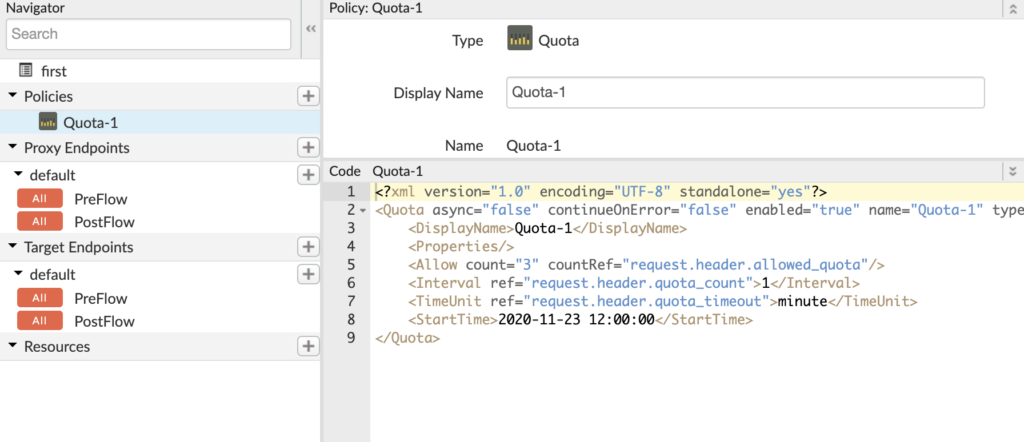
We can add a step to request flow or response flow. Let’s add a policy to request flow by clicking on the +Step button. To start, let’s add a quota policy.
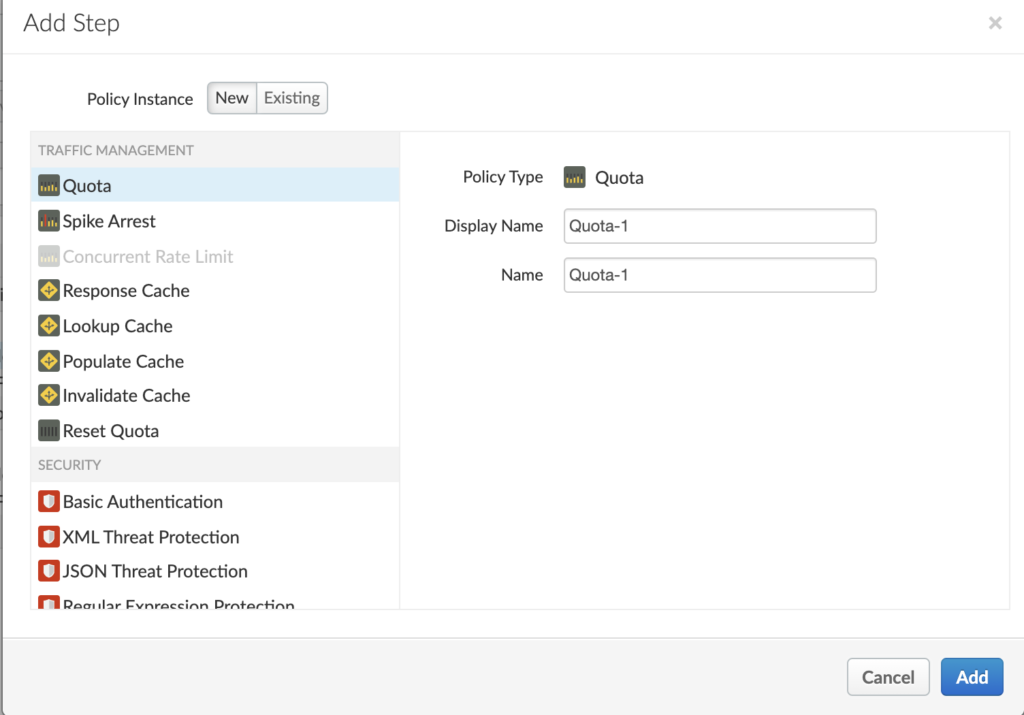
By default, the quota policy gives settings for 2000 requests per month. For sake of this test, let’s modify it to 3 calls per minute.
To test the quota implementation, we can go to the trace tab and hit the URL multiple times. We can see response code 429 (too many requests), caused by the quota limit.
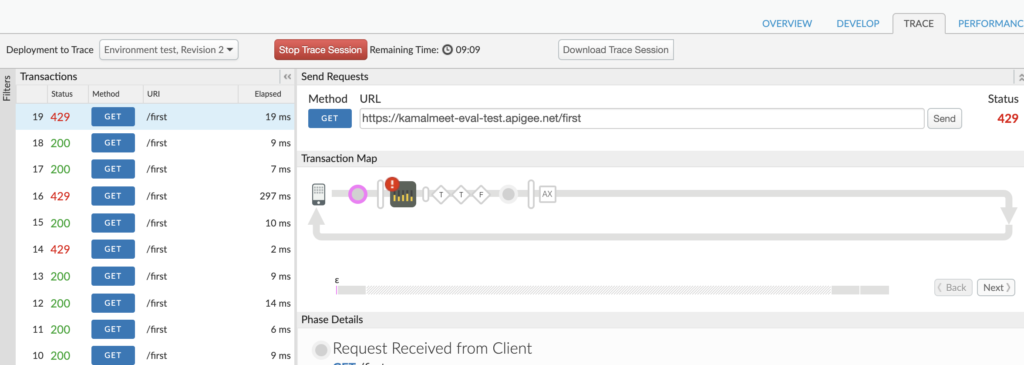
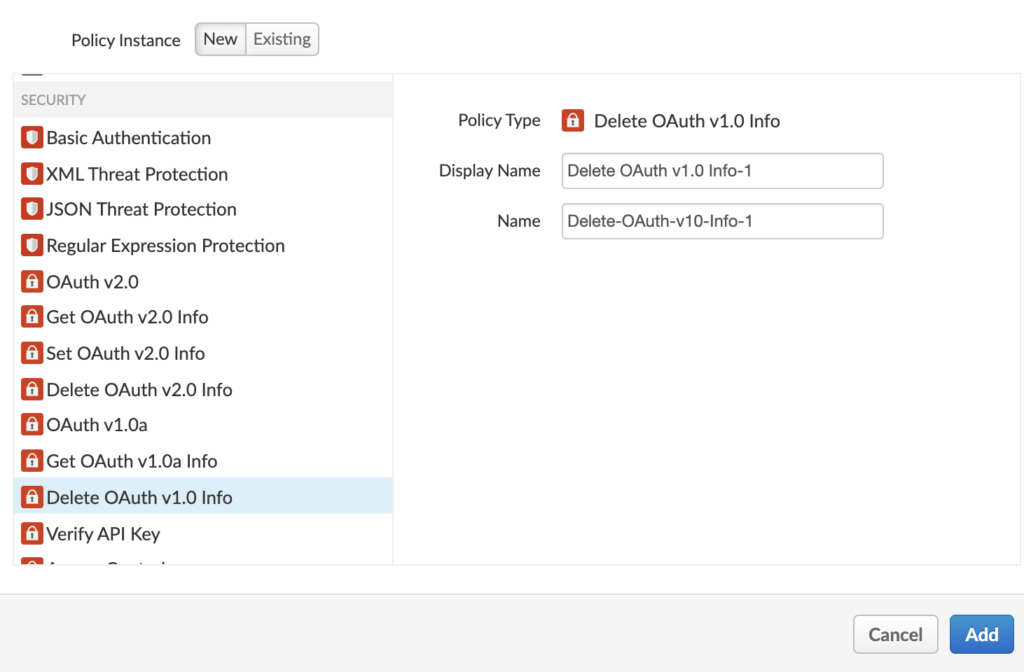
We have implemented the quota policy, which can be very useful to stop a bot attack on our API. Similarly, Apigee provides us with a set of policies categorized under traffic management, security, and mediation. For traffic management, we have a quota, spike arrest, caching, etc. For Security, we have policies like Basic Auth, JSON threat protection, XML threat protection, OAuth, and so on.
For mediation, we have policy likes, JSON to XML, XML to JSON, XSL transformation, etc.
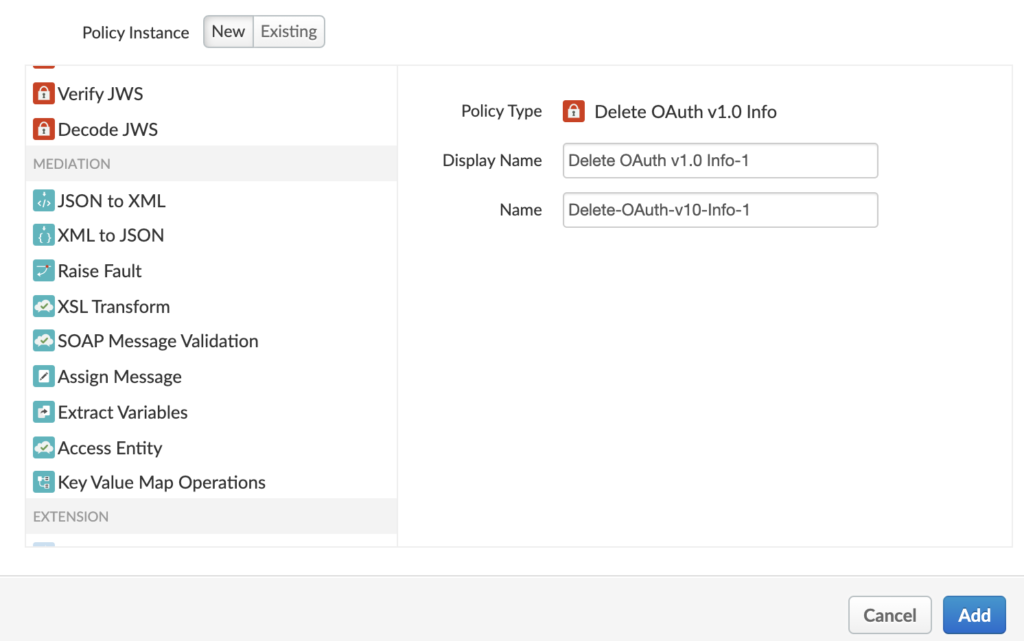
In the example we created, we added a policy to the incoming request, similarly, we can add a policy to response, for example, if we apply JSON to XML policy to the response, we will start receiving XML response instead of JSON.