In this post we will go over three things majorly, firstly we will start with setting up Envoy proxy on the local machine, second, we will set up layer 4 and layer 7 proxy, and finally, we will implement an external authorization filter.
Setup Envoy Proxy
Envoy proxy can be installed on most of the popular OS and also has a docker installation. The site gives very good documentation for getting started –https://www.envoyproxy.io/docs/envoy/latest/start/start. For this example, I am setting up an envoy proxy on Mac OS.
First of all, make sure you have brew installed. Then execute the following commands to install envoy proxy
brew tap tetratelabs/getenvoy
brew install envoy
Finally, check the installation: envoy --version
Setup Level 7 and Level 4 Proxy
Before jumping into the difference between layer 4 and layer 7 proxy, it makes sense to revisit the OSI model or open system interconnection model. OSI model helps us visualize networking communication as 7 layered representation, where each layer adds functionality on top of the previous layer.
For OSI Model Refer https://en.wikipedia.org/wiki/OSI_model
Focusing on layer 4 and layer 7, we understand a very important difference. At layer 7, we have a complete request coming in from the client i.e. we understand what the actual request is? is it a GET request or a POST request? is the end-user asking for /employee or /department? whereas at layer 4 all we are looking at is data packets in raw format, hence there is no way for us to know what resource is being requested for.
Layer 7 implementation makes sure that the proxy receives all the incoming packets for a request, recreates the request, and makes a call to the backend server. This helps us implement certain features like TLS offloading, data validation, rate limiting on specific APIs, etc. On the other hand, for Layer 4 proxy, all we are doing is passing on the packets being received to the backend server. The advantage here is that it is fast (no data processing) and can be considered secured (again we are not looking into data). Based on application need one can choose either layer 7 or layer 4 proxying.
For demonstrating the usage of Envoy proxy implementation, we will need to set up some sample applications. Here I have created a couple of “Hello World” applications locally on port 1111 and port 2222.
$curl localhost:1111
Hello World from 1111
$curl localhost:2222
Hello World from 2222
To start with, we are setting up a layer 7 proxy. We will create an Envoy proxy config YAML file with details of the filters and clusters we are using. Here is a reference YAML- https://www.envoyproxy.io/docs/envoy/latest/configuration/overview/examples#static
static_resources:
  listeners:
    - name: listener_0
      address:
        socket_address: { address: 127.0.0.1, port_value: 8080 }
      filter_chains:
        - filters:
          - name: envoy.filters.network.http_connection_manager
            typed_config:
              "@type": type.googleapis.com/envoy.extensions.filters.network.http_connection_manager.v3.HttpConnectionManager
              stat_prefix: ingress_http
              codec_type: AUTO
              route_config:
                name: local_route
                virtual_hosts:
                - name: local_service
                  domains: ["*"]
                  routes:
                  - match: { prefix: "/" }
                    route: { cluster: some_service }
              http_filters:
              - name: envoy.filters.http.router
  clusters:
    - name: some_service
      connect_timeout: 1s
      type: STATIC
      lb_policy: round_robin
      load_assignment:
        cluster_name: some_service
        endpoints:
          - lb_endpoints:
            - endpoint:
                address:
                  socket_address:
                    address: 127.0.0.1
                    port_value: 1111
            - endpoint:
                address:
                  socket_address:
                    address: 127.0.0.1
                    port_value: 2222
A couple of things to observe in the above YAML file, first observe the filter we are using here. We are using envoy.filters.network.http_connection_manager which is the simplest filter we use to redirect traffic. The second important thing to observe is the source and destination ports. We are listening to the traffic at port 8080 and redirecting to port 1111. This is a simple example where both envoy proxy and application server are running on the same local machine, whereas this would not be the case in the real world and we will see more meaningful usage of cluster address. For now, let’s run and test the envoy proxy.
Start envoy proxy with the config YAML created.
envoy --config-path ~/Desktop/workspace/envoyexample.yaml
Once the envoy is started successfully, you will see we are able to hit port 8080 and getting the output from port 1111 and 2222 in a random fashion.
$curl localhost:8080
Hello World from 1111
$curl localhost:8080
Hello World from 2222
To convert the existing Envoy proxy config YAML to support layer 4 routing, we just need to change the name and type of filter to envoy.filters.network.tcp_proxy
static_resources:
  listeners:
    - name: listener_0
      address:
        socket_address: { address: 127.0.0.1, port_value: 8080 }
      filter_chains:
        - filters:
          - name: envoy.filters.network.tcp_proxy
            typed_config:
              "@type": type.googleapis.com/envoy.config.filter.network.tcp_proxy.v2.TcpProxy
              stat_prefix: ingress_http
              cluster: some_service
  clusters:
    - name: some_service
      connect_timeout: 1s
      type: STATIC
      lb_policy: round_robin
      load_assignment:
        cluster_name: some_service
        endpoints:
          - lb_endpoints:
            - endpoint:
                address:
                  socket_address:
                    address: 127.0.0.1
                    port_value: 1111
            - endpoint:
                address:
                  socket_address:
                    address: 127.0.0.1
                    port_value: 2222
You can see the YAML looks simpler as we cannot support path-based routing in layer 4 reverse proxy. The results remain the same as hitting localhost:8080 will still hit backend servers running at 1111 or 2222, but as explained above, the mechanism being used behind the scenes has changed.
Setup External Auth using LDAP
Usually you will have an externalized service for providing authentication feature, and you will add the auth filter to Envoy proxy config. For this example I will start with setting up a simple LDAP auth service.
A utility file to validate the credentials.
public class LDAPAuth {
	public static boolean authenticateJndi(String username, String password) throws Exception{

	    try {
	    	Properties  props = new Properties();
	        props.put(Context.INITIAL_CONTEXT_FACTORY, "com.sun.jndi.ldap.LdapCtxFactory");
	        props.put(Context.PROVIDER_URL, "ldap://ldap.forumsys.com:389/");
	        var principal = "cn="+ username+ ",dc=example,dc=com";
	        props.put(Context.SECURITY_PRINCIPAL, principal);
	        props.put(Context.SECURITY_CREDENTIALS, password);
	        InitialDirContext context = new InitialDirContext(props);
	    } catch (Exception e) {
	        return false;
	    }
	    return true;
	}
}
And a controller
@RestController
public class AuthController {

	@GetMapping("/")
	public ResponseEntity<String> sayHello(@RequestHeader Map<String, String> headers) {
		headers.forEach((key, value) -> {
			System.out.println(key +" - " + value);
		});
		String authorization = headers.get("authorization");
	    String base64Credentials = authorization.substring("Basic".length()).trim();
	    String credentials = new String(Base64.getDecoder().decode(base64Credentials));

	    final String[] values = credentials.split(":", 2);
		String username = values[0];
		String password = values[1];
		System.out.println("user:"+username);
		System.out.println("pass:"+password);
		try {
			var success = LDAPAuth.authenticateJndi(username, password);
			System.out.println("returned:"+success);
			if(!success) {
				return new ResponseEntity<String>(HttpStatus.FORBIDDEN);
			}
		} catch (Exception e) {
			e.printStackTrace();
		}
		return new ResponseEntity<String>(HttpStatus.OK);
	}
}
We will expose the authentication service at port 3333 for this example. Once we have that, all we need to do is to introduce authentication filer in our envoy config at layer 7 reverse proxy settings.
static_resources:
  listeners:
    - name: listener_0
      address:
        socket_address: { address: 127.0.0.1, port_value: 8080 }
      filter_chains:
      - filters:
        - name: envoy.http_connection_manager
          config:
            codec_type: auto
            stat_prefix: ingress_http
            route_config:
              name: local_route
              virtual_hosts:
              - name: backend
                domains:
                - "*"
                routes:
                  - match:
                      prefix: /
                    route:
                      cluster: some_service
            http_filters:
            - name: envoy.ext_authz
              config:
                http_service:
                  server_uri:
                    uri: auth:8080
                    cluster: ext-authz
                    timeout: 5s
            - name: envoy.router
              config: {}
  clusters:
    - name: some_service
      connect_timeout: 1s
      type: STATIC
      lb_policy: round_robin
      load_assignment:
        cluster_name: some_service
        endpoints:
          - lb_endpoints:
            - endpoint:
                address:
                  socket_address:
                    address: 127.0.0.1
                    port_value: 1111
    - name: ext-authz
      connect_timeout: 1s
      type: STATIC
      lb_policy: round_robin
      load_assignment:
        cluster_name: ext-authz
        endpoints:
          - lb_endpoints:
            - endpoint:
                address:
                  socket_address:
                    address: 127.0.0.1
                    port_value: 3333
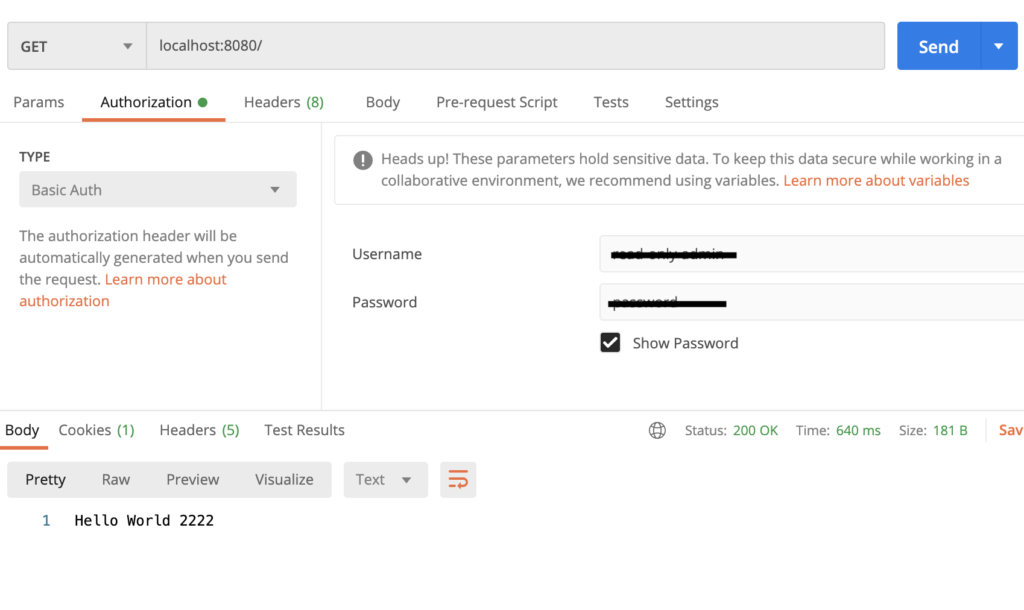
Once we start the Envoy proxy, we have a auth filter in place now.
envoy --config-path ~/Desktop/workspace/envoyexample.yaml
To have a successful response, we need to make sure we are sending correct authorization header now.